# 1.1 DOM---接口 处理 XML 和 HTML 的
-----可以改变网页的内容,结构和样式
# 1.2 DOM 树
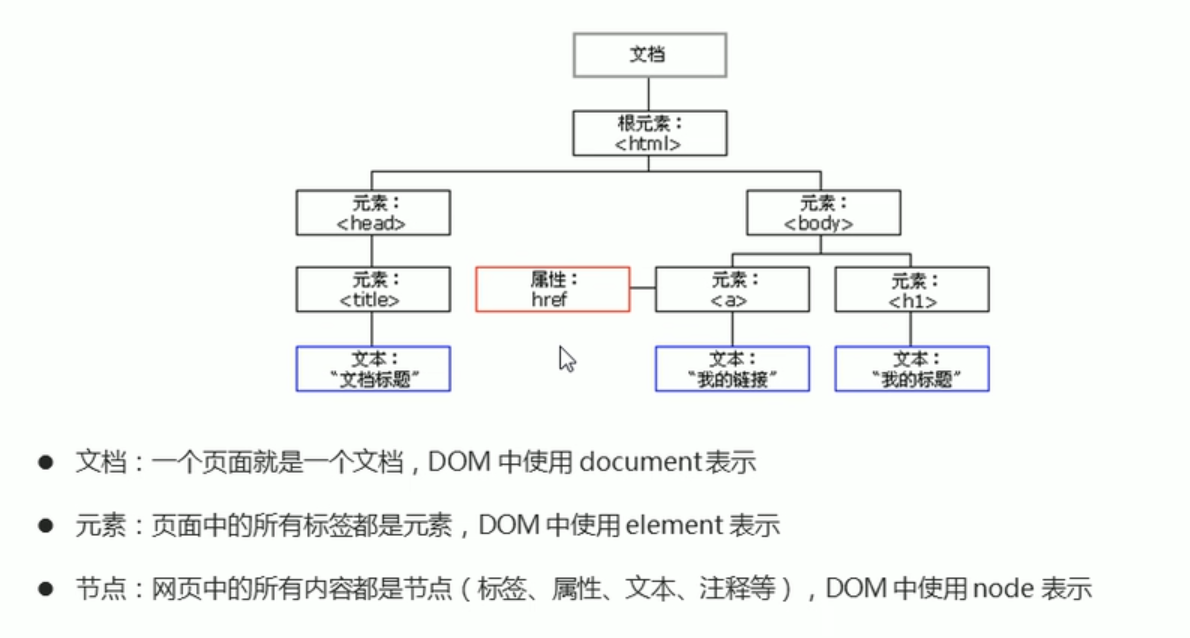
DOM 把以上内容都看做是对象
# 1.3 获取元素
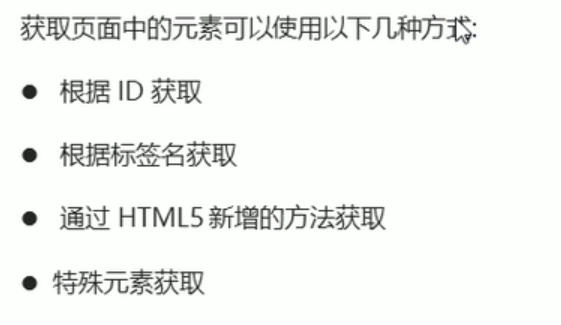
# 1.3.1 根据 ID ---getElementId()
<!DOCTYPE html>
<html lang="en">
  <head>
    <meta charset="UTF-8" />
    <title>Title</title>
  </head>
  <body>
    <div id="time">2022-7-14</div>
    <script>
      //1. 因为文档页面是从上到下加载的,所以先得有标签,script写在标签下面
      //2. get获得element元素 by通过
      //3.参数 id是大小写敏感的字符串
      //4.返回的是一个元素对象
      var timer = document.getElementById('time')
      console.log(timer)
      //console.dir() 打印我们返回的元素对象。更好的查看里面的属性和方法
      console.dir(timer)
    </script>
  </body>
</html>
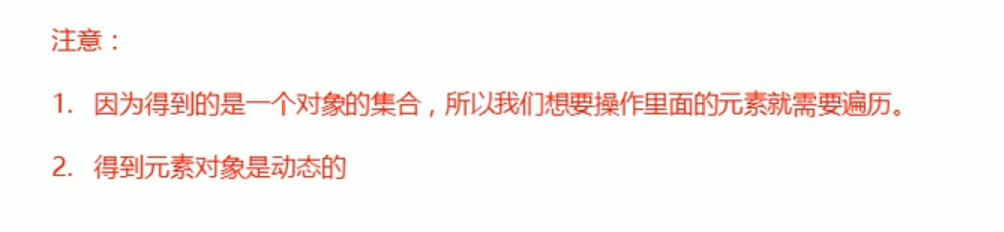
# 1.3.2 根据标签名获取---getElementsByTagName() 返回标签集合

<!DOCTYPE html>
<html lang="en">
  <head>
    <meta charset="UTF-8" />
    <title>Title</title>
  </head>
  <body>
    <ul>
      <li>知否知否,应是绿肥红瘦</li>
      <li>知否知否,应是绿肥红瘦</li>
      <li>知否知否,应是绿肥红瘦</li>
      <li>知否知否,应是绿肥红瘦</li>
      <li>知否知否,应是绿肥红瘦</li>
      <li>知否知否,应是绿肥红瘦</li>
    </ul>
    <ol id="ol">
      <li>生僻字</li>
      <li>生僻字</li>
      <li>生僻字</li>
      <li>生僻字</li>
      <li>生僻字</li>
    </ol>

    <script>
      var list = document.getElementsByTagName('li')
      console.log(list)
      console.log(list[0])
      for (var i = 0; i < list.length; i++) {
        console.log(list[i])
      }
      //如果页面中只有一个li,返回的还是伪数组的形式
      //如果页面中没有li,返回的是空的伪数组
      //element.getElementsByTagName('标签名')
      // var ol =document.getElementsByTagName('ol')
      // console.log(ol[0].getElementsByTagName('li')).
      //方式2:
      var ol = document.getElementById('ol')
      console.log(ol.getElementsByTagName('li'))
    </script>
  </body>
</html>
# 1.4 H5 新增获取元素方式 document.getClassByName('类名')

<!DOCTYPE html>
<html lang="en">
  <head>
    <meta charset="UTF-8" />
    <title>Title</title>
  </head>
  <body>
    <div class="box">盒子1</div>
    <div class="box">盒子2</div>
    <div id="nav">
      <ul>
        <li></li>
        <li></li>
      </ul>
    </div>
    <script>
      //根据类名选择指定元素
      // var box=document.getElementsByClassName('box')
      // console.log(box)
      //h5新增选择元素方式
      //1.document.querySelector() 返回指定的元素的第一个元素,注意:需要带符号  类:.box   id:#nav
      // var firstBox=document.querySelector('.box')
      // console.log(firstBox)
      //2.document.querySelectorAll()  返回指定的所有元素
      // var boxAll=document.querySelectorAll('.box')
      // console.log(boxAll)
      // var nav=document.querySelectorAll('#nav')
      // console.log(nav)
    </script>
  </body>
</html>
# 1.5 获取特殊元素
<!DOCTYPE html>
<html lang="en">
  <head>
    <meta charset="UTF-8" />
    <title>Title</title>
  </head>
  <body>
    <script>
      //获取body元素
      var body = document.body
      console.log(body)
      //获取HTML元素
      var html = document.documentElement
      console.log(html)
    </script>
  </body>
</html>
# 1.6 事件三要素 事件源,事件类型,事件处理程序
# 事件源:事件被出发的对象
# 事件类型:如何触发 什么事件 比如:鼠标经过,鼠标按下...
# 事件处理程序:通过一个函数赋值的方式完成
<!DOCTYPE html>
<html lang="en">
<head>
    <meta charset="UTF-8">
    <title>Title</title>
</head>
<body>
    <button id="btn">点我一下</button>
    <script>
        var btn=document.getElementById('btn')
        btn.onclick=function (){
            alert("被点到了哦");
        }
    </script>
</body>
</html>
步骤:
- 获取事件源
- 注册事件(绑定事件)
- 添加事件处理程序(采取函数赋值形式)
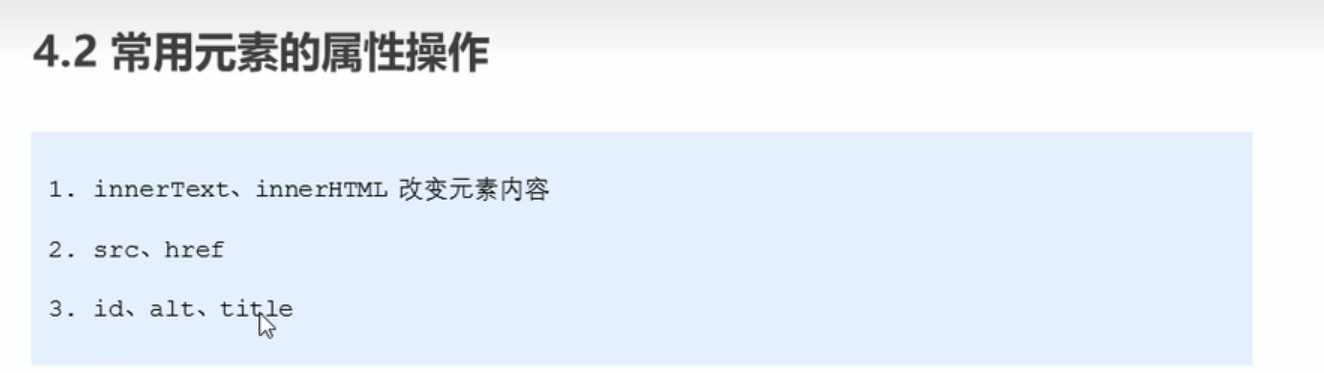
# 1.7 操作元素
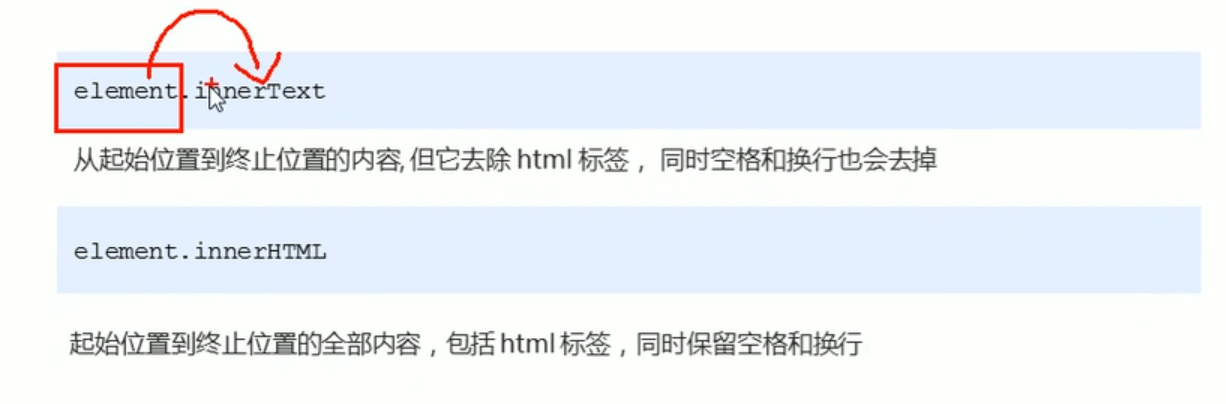
# 1.7.1 改变元素的内容
element.innerText
element.innerHtml
<!DOCTYPE html>
<html lang="en">
  <head>
    <meta charset="UTF-8" />
    <title>Title</title>
  </head>
  <body>
    <input type="button" value="点我显示当前时间" id="btn" />
    <div id="text">今天天气真不错</div>
    <p id="p"></p>
    <script>
      const btn = document.getElementById('btn')
      const text = document.getElementById('text')
      btn.onclick = function () {
        text.innerText = getDate()
      }
      function getDate() {
        var now = new Date()
        var year = now.getFullYear()
        var month = now.getMonth() + 1
        var date = now.getDate()
        var day = now.getDay()
        var dayArr = ['星期一', '星期二', '星期三', '星期四', '星期五', '星期六', '星期日']
        var hour = now.getHours()
        var min = now.getMinutes()
        var second = now.getSeconds()
        return (
          '今天是' +
          year +
          '年' +
          month +
          '月' +
          date +
          '日' +
          ' ' +
          hour +
          ':' +
          min +
          ':' +
          second +
          ' ' +
          dayArr[day - 1]
        )
      }
      var p = document.getElementById('p')
      p.innerText = getDate()
      // innerText 和innerHTML的区别
      // innerText:不识别HTML标签  非标准  去除空格和换行
      //innerHTML:识别html标签  W3C标准   保留空格和换行的
      //这两个属性是可读写的
    </script>
  </body>
</html>
# 1.8 修改元素的属性
<!DOCTYPE html>
<html lang="en">
  <head>
    <meta charset="UTF-8" />
    <title>Title</title>
  </head>
  <style>
    button {
      margin-bottom: 10px;
    }
  </style>
  <body>
    <button id="Vue">Vue</button>
    <button id="React">React</button>
    <br />
    <img src="./img/banner01.jpg" alt="" title="Vue真好用" />
    <script>
      var Vue = document.getElementById('Vue')
      var react = document.getElementById('React')
      var img = document.querySelector('img')
      Vue.onclick = function () {
        img.src = './img/banner01.jpg'
        img.title = 'Vue真好用'
      }
      react.onclick = function () {
        img.src = './img/banner04.jpg'
        img.title = 'React真高级'
      }
    </script>
  </body>
</html>
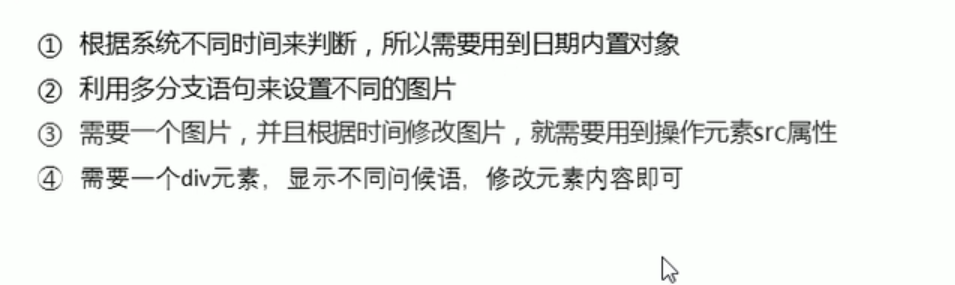
# 案例:
<!DOCTYPE html>
<html lang="en">
  <head>
    <meta charset="UTF-8" />
    <title>Title</title>
  </head>
  <body>
    <img src="./img/shang.gif" alt="" />
    <div></div>
    <script>
      var img = document.querySelector('img')
      var div = document.querySelector('div')
      var h = new Date().getHours()
      if (h < 12) {
        img.src = './img/wan.gif'
        div.innerHTML = '<strong>亲~ 早上好,好好写代码哦</strong>'
      } else if (h < 18) {
        img.src = './img/xia.jpeg'
        div.innerHTML = '<strong>亲~ 下午好,好好写代码哦</strong>'
      } else {
        img.src = './img/shang.gif'
        div.innerHTML = '<strong>亲~ 晚上好,好好写代码哦</strong>'
      }
    </script>
  </body>
</html>
# 1.9 表单元素的属性操作

表单里面的值是通过 value 来修改的
<!DOCTYPE html>
<html lang="en">
  <head>
    <meta charset="UTF-8" />
    <title>Title</title>
  </head>
  <body>
    <button>按钮</button>
    <input type="text" name="" value="请输入内容" />
    <script>
      var btn = document.querySelector('button')
      var input = document.querySelector('input')
      btn.onclick = function () {
        //input.innerHTML='点击了' 这个是普通盒子 比如div盒子里的内容
        //表单里面的值,文字内容是通过value来修改的
        input.value = '请开始输入'
        //this指向的是事件函数的调用者   btn
        this.disabled = true
      }
    </script>
  </body>
</html>
# 2.0 京东密码眼睛案例
<!DOCTYPE html>
<html lang="en">
  <head>
    <meta charset="UTF-8" />
    <title>密码框案例</title>
  </head>
  <style>
    .box {
      position: relative;
      width: 400px;
      border: 1px solid #ccc;
      margin: 100px auto;
    }
    .box input {
      width: 300px;
      height: 30px;
      outline: none;
      border: 0;
    }
    img {
      position: absolute;
      top: 9px;
      right: 12px;
      width: 15px;
      height: 15px;
    }
  </style>
  <body>
    <div class="box">
      <label>
        <img src="./img/眼睛-关.png" alt="" />
      </label>
      <input type="password" name="" id="" />
      <script>
        var input = document.querySelector('input')
        var img = document.querySelector('img')
        var flag = 0
        img.onclick = function () {
          if (flag == 0) {
            img.src = './img/眼睛-开.png'
            input.type = 'text'
            flag = 1
          } else {
            img.src = './img/眼睛-关.png'
            input.type = 'password'
            flag = 0
          }
        }
      </script>
    </div>
  </body>
</html>
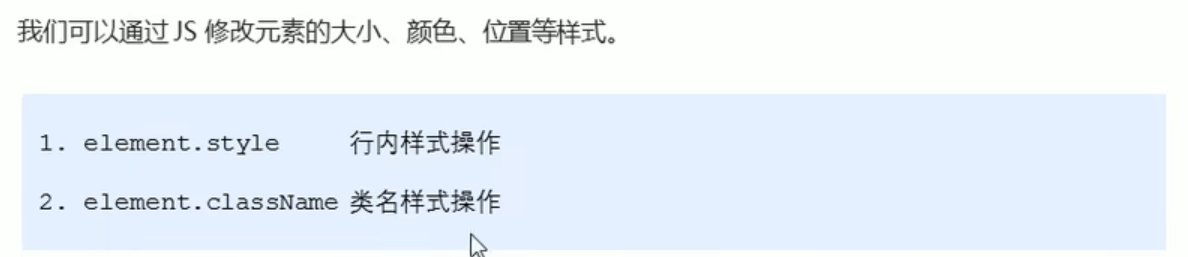
# 2.1 样式属性操作

<!DOCTYPE html>
<html lang="en">
  <head>
    <meta charset="UTF-8" />
    <title>Title</title>
  </head>
  <style>
    div {
      width: 200px;
      height: 200px;
      background-color: pink;
    }
  </style>
  <body>
    <div></div>
  </body>
  <script>
    var div = document.querySelector('div')
    var flag = 0
    div.onclick = function () {
      if (flag == 0) {
        div.style.backgroundColor = 'red'
        div.style.width = '500px'
        flag = 1
      } else {
        div.style.backgroundColor = 'pink'
        flag = 0
      }
    }
  </script>
</html>
# 2.2 案例:关闭二维码

<!DOCTYPE html>
<html lang="en">
  <head>
    <meta charset="UTF-8" />
    <title>Title</title>
  </head>
  <style>
    .box {
      position: relative;
      width: 300px;
      height: 300px;
      margin: 50px auto;
    }
    .box i {
      position: absolute;
      top: 0;
      left: -19px;
    }
    .box i:hover {
      cursor: pointer;
      background-color: #cccccc;
    }
  </style>
  <body>
    <div class="box">
      <img src="./img/code.webp" alt="" />
      <i class="icon_close">×</i>
    </div>
    <script>
      var box = document.querySelector('.box')
      var btn = document.querySelector('.icon_close')
      btn.onclick = function () {
        box.style.display = 'none'
      }
    </script>
  </body>
</html>
# 2.3 循环精灵图

<!DOCTYPE html>
<html lang="en">
  <head>
    <meta charset="UTF-8" />
    <title>Title</title>
  </head>
  <style>
    .box {
      width: 300px;
      height: 300px;
      margin: 100px auto;
      /*background-color: pink;*/
    }
    .box li {
      float: left;
      width: 24px;
      height: 24px;
      background-color: pink;
      margin: 15px;
      background: url('./img/taobao.png') no-repeat;
      list-style-type: none;
    }
  </style>
  <body>
    <div class="box">
      <ul>
        <li></li>
        <li></li>
        <li></li>
        <li></li>
        <li></li>
        <li></li>
        <li></li>
        <li></li>
        <li></li>
      </ul>
    </div>
    <script>
      var list = document.querySelectorAll('li')
      for (var i = 0; i < list.length; i++) {
        var index = -44 * i
        list[i].style.backgroundPosition = '0 ' + index + 'px'
      }
      // var list = document.querySelectorAll('li');
      //
      // for (var i = 0; i < list.length; i++) {
      //     var y = -44 * i;
      //     list[i].style.backgroundPosition = '0 ' + y + 'px';
      // }
    </script>
  </body>
</html>
# 2.4 显示隐藏文本框内容

<!DOCTYPE html>
<html lang="en">
  <head>
    <meta charset="UTF-8" />
    <title>Title</title>
  </head>
  <style>
    input {
      display: block;
      width: 300px;
      height: 30px;
      margin: 100px auto;
      outline: none;
      color: #999;
    }
  </style>
  <body>
    <input type="text" name="" id="text" value="手机" />
    <script>
      var text = document.getElementById('text')
      var values = text.value
      //onfocus 获得焦点
      text.onfocus = function () {
        if (values === '手机') {
          this.value = ''
        }
        //颜色变深
        this.style.color = '#333'
      }
      //onblur  失去焦点
      text.onblur = function () {
        if (values === ' ') this.value = values
        //颜色变浅
        this.style.color = '#999'
      }
    </script>
  </body>
</html>
# 2.5 使用 className 修改样式属性 --会直接更改元素的类名,覆盖之间的类名

<!DOCTYPE html>
<html lang="en">
<head>
    <meta charset="UTF-8">
    <title>Title</title>
    <style>
        div {
            width: 200px;
            height: 200px;
            background-color: pink;
        }
        .change {
            background-color: purple;
            width: 300px;
            height: 300px;
            margin: 100px auto;
        }
    </style>
<body>
    <div>属性</div>
    <script>
        var div=document.querySelector('div')
        div.onclick=function (){
            //element.style 获得修改元素的样式  适合样式比较少,或者功能比较简单的情况
            this.style.backgroundColor='purple'
            //我们可以通过 修改元素的className 更改元素的样式,适合样式多或功能比较复杂的情况
            this.className='change'
            // 如要要保留之前的类名
             this.className='first change'
        }
    </script>
</body>
</html>
# 2.6 密码验证信息案例
<!DOCTYPE html>
<html lang="en">
  <head>
    <meta charset="UTF-8" />
    <title>Title</title>
  </head>
  <style>
    .box {
      width: 600px;
      margin: 100px auto;
    }

    .message {
      display: inline-block;
      font-size: 12px;
      color: #999;
      background: url('./img/mess.png') no-repeat left center;
      padding-left: 20px;
    }
    .wrong {
      color: red;
      background: url('./img/wrong.png') no-repeat left center;
    }
    .right {
      color: green;
      background: url('./img/right.png') no-repeat left center;
    }
  </style>
  <body>
    <div class="box">
      <input type="password" name="password" id="pwd" />
      <p class="message">请输入您的密码</p>
    </div>
    <script>
      var input = document.querySelector('input')
      var msg = document.querySelector('.message')
      input.onblur = function () {
        if (input.value.length < 6 || input.value.length > 16) {
          msg.className = 'message wrong'
          msg.innerHTML = '密码位数应在6-16位之间'
        } else {
          msg.className = 'message right'
          msg.innerHTML = '您输入的密码正确'
        }
      }
    </script>
  </body>
</html>
# 2.7 开关灯作业
<!DOCTYPE html>
<html lang="en">
  <head>
    <meta charset="UTF-8" />
    <title>Title</title>
  </head>
  <style>
    button {
      background-color: #fff;
    }
  </style>
  <body>
    <button>开关灯按键</button>
    <script>
      var btn = document.querySelector('button')
      var body = document.body
      var flag = 0
      btn.onclick = function () {
        if (flag == 0) {
          body.style.backgroundColor = '#fff'
          flag = 1
        } else {
          body.style.backgroundColor = '#000'
          flag = 0
        }
      }
    </script>
  </body>
</html>
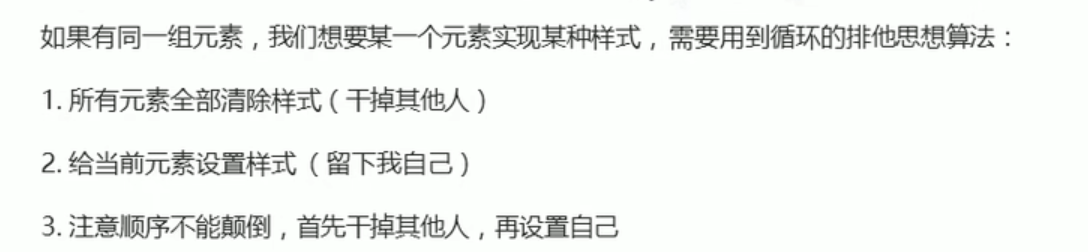
# 2.8 排他思想(算法)
<!DOCTYPE html>
<html lang="en">
  <head>
    <meta charset="UTF-8" />
    <title>Title</title>
  </head>
  <body>
    <button>按钮1</button>
    <button>按钮2</button>
    <button>按钮3</button>
    <button>按钮4</button>
    <button>按钮5</button>
  </body>
  <script>
    var btns = document.getElementsByTagName('button')
    for (var i = 0; i < btns.length; i++) {
      btns[i].onclick = function () {
        //再设置背景颜色前,先把其他组件的背景颜色设置为空
        for (var j = 0; j < btns.length; j++) {
          btns[j].style.backgroundColor = ''
        }
        //将当前被点击到的按钮的背景颜色设置为pink色
        this.style.backgroundColor = 'pink'
      }
    }
  </script>
</html>
# 2.9 百度换肤案例
<!DOCTYPE html>
<html lang="en">
  <head>
    <meta charset="UTF-8" />
    <title>Title</title>
  </head>
  <style>
    * {
      margin: 0;
      padding: 0;
    }
    .box {
      width: 640px;
      height: 100px;
      background-color: pink;
      margin: 100px auto;
    }
    .box ul {
      width: 100%;
    }
    .box ul li {
      float: left;
      list-style: none;
      width: 160px;
      height: 100px;
      background-color: purple;
    }
    .box ul li img {
      width: 160px;
    }
    body {
      background: url('./img/1.jpg') no-repeat;
    }
  </style>
  <body>
    <div class="box">
      <ul>
        <li><img src="./img/1.jpg" alt="" /></li>
        <li><img src="img/2.jpg" /></li>
        <li><img src="./img/3.jpg" alt="" /></li>
        <li><img src="./img/4.jpg" alt="" /></li>
      </ul>
    </div>
    <script>
      var list = document.querySelectorAll('img')
      console.log(list)
      var body = document.body
      for (var i = 0; i < list.length; i++) {
        list[i].onclick = function () {
          body.style.backgroundImage = 'url(' + this.src + ')'
        }
      }
    </script>
  </body>
</html>
# 3.0 表格各行变色
<!DOCTYPE html>
<html lang="en">
  <head>
    <meta charset="UTF-8" />
    <meta name="viewport" content="width=device-width, initial-scale=1.0" />
    <meta http-equiv="X-UA-Compatible" content="ie=edge" />
    <title>Document</title>
    <style>
      table {
        width: 800px;
        margin: 100px auto;
        text-align: center;
        border-collapse: collapse;
        font-size: 14px;
      }

      thead tr {
        height: 30px;
        background-color: skyblue;
      }

      tbody tr {
        height: 30px;
      }

      tbody td {
        border-bottom: 1px solid #d7d7d7;
        font-size: 12px;
        color: blue;
      }

      .bg {
        background-color: pink;
      }
    </style>
  </head>

  <body>
    <table>
      <thead>
        <tr>
          <th>代码</th>
          <th>名称</th>
          <th>最新公布净值</th>
          <th>累计净值</th>
          <th>前单位净值</th>
          <th>净值增长率</th>
        </tr>
      </thead>
      <tbody>
        <tr>
          <td>003526</td>
          <td>农银金穗3个月定期开放债券</td>
          <td>1.075</td>
          <td>1.079</td>
          <td>1.074</td>
          <td>+0.047%</td>
        </tr>
        <tr>
          <td>003526</td>
          <td>农银金穗3个月定期开放债券</td>
          <td>1.075</td>
          <td>1.079</td>
          <td>1.074</td>
          <td>+0.047%</td>
        </tr>
        <tr>
          <td>003526</td>
          <td>农银金穗3个月定期开放债券</td>
          <td>1.075</td>
          <td>1.079</td>
          <td>1.074</td>
          <td>+0.047%</td>
        </tr>
        <tr>
          <td>003526</td>
          <td>农银金穗3个月定期开放债券</td>
          <td>1.075</td>
          <td>1.079</td>
          <td>1.074</td>
          <td>+0.047%</td>
        </tr>
        <tr>
          <td>003526</td>
          <td>农银金穗3个月定期开放债券</td>
          <td>1.075</td>
          <td>1.079</td>
          <td>1.074</td>
          <td>+0.047%</td>
        </tr>
        <tr>
          <td>003526</td>
          <td>农银金穗3个月定期开放债券</td>
          <td>1.075</td>
          <td>1.079</td>
          <td>1.074</td>
          <td>+0.047%</td>
        </tr>
      </tbody>
    </table>
    <script>
      var trs = document.querySelector('tbody').querySelectorAll('tr')
      for (var i = 0; i < trs.length; i++) {
        trs[i].onmouseover = function () {
          console.log(11)
          this.className = 'bg'
        }
        trs[i].onmouseout = function () {
          this.className = ''
        }
      }
    </script>
  </body>
</html>
# 3.1 表单的全选取消全选(重点)

<!DOCTYPE html>
<html>
  <head lang="en">
    <meta charset="UTF-8" />
    <title></title>
    <style>
      * {
        padding: 0;
        margin: 0;
      }

      .wrap {
        width: 300px;
        margin: 100px auto 0;
      }

      table {
        border-collapse: collapse;
        border-spacing: 0;
        border: 1px solid #c0c0c0;
        width: 300px;
      }

      th,
      td {
        border: 1px solid #d0d0d0;
        color: #404060;
        padding: 10px;
      }

      th {
        background-color: #09c;
        font: bold 16px '微软雅黑';
        color: #fff;
      }

      td {
        font: 14px '微软雅黑';
      }

      tbody tr {
        background-color: #f0f0f0;
      }

      tbody tr:hover {
        cursor: pointer;
        background-color: #fafafa;
      }
    </style>
  </head>

  <body>
    <div class="wrap">
      <table>
        <thead>
          <tr>
            <th>
              <input type="checkbox" id="j_cbAll" />
            </th>
            <th>商品</th>
            <th>价钱</th>
          </tr>
        </thead>
        <tbody id="j_tb">
          <tr>
            <td>
              <input type="checkbox" />
            </td>
            <td>iPhone8</td>
            <td>8000</td>
          </tr>
          <tr>
            <td>
              <input type="checkbox" />
            </td>
            <td>iPad Pro</td>
            <td>5000</td>
          </tr>
          <tr>
            <td>
              <input type="checkbox" />
            </td>
            <td>iPad Air</td>
            <td>2000</td>
          </tr>
          <tr>
            <td>
              <input type="checkbox" />
            </td>
            <td>Apple Watch</td>
            <td>2000</td>
          </tr>
        </tbody>
      </table>
    </div>
    <script>
      var j_cbAll = document.getElementById('j_cbAll') //上面的全选复选框
      var j_tbs = document.getElementById('j_tb').getElementsByTagName('input') //下面的复选框
      // 将下面复选框的选中状态与上面全选复选框的选中状态保持一致
      j_cbAll.onclick = function () {
        for (var i = 0; i < j_tbs.length; i++) {
          j_tbs[i].checked = this.checked
        }
        // 下面的复选框全部点击,上面的复选框才会被点击,下面的复选框每次被点击,都要检查四个复选框是否都被选中
        for (var i = 0; i < j_tbs.length; i++) {
          j_tbs[i].onclick = function () {
            var flag = true
            for (var j = 0; j < j_tbs.length; j++) {
              if (!j_tbs[j].checked) {
                //判断是否有复选框未被选中
                flag = false
                break //一有不满足,退出循环,可以提高开发效率
              }
            }
            j_cbAll.checked = flag
          }
        }
      }
    </script>
  </body>
</html>
# 3.2 自定义属性的操作
获取元素的属性值: (1) element.属性:获得内置属性值*
(2)element.getAttribute(属性):主要获得自定义属性值**
程序员自己添加的属性:自定义属性
设置元素的属性值
element.属性=‘值’
element.setAttribute('属性','值‘):主要针对于自定义属性

3.移除元素的属性值**
element.removeAttribute('属性')
# 案例:tab 栏切换(重点)
<!DOCTYPE html>
<html lang="en">
  <head>
    <meta charset="UTF-8" />
    <meta name="viewport" content="width=device-width, initial-scale=1.0" />
    <meta http-equiv="X-UA-Compatible" content="ie=edge" />
    <title>Document</title>
    <style>
      * {
        margin: 0;
        padding: 0;
      }

      li {
        list-style-type: none;
      }

      .tab {
        width: 978px;
        margin: 100px auto;
      }

      .tab_list {
        height: 39px;
        border: 1px solid #ccc;
        background-color: #f1f1f1;
      }

      .tab_list li {
        float: left;
        height: 39px;
        line-height: 39px;
        padding: 0 20px;
        text-align: center;
        cursor: pointer;
      }

      .tab_list .current {
        background-color: #c81623;
        color: #fff;
      }

      .item_info {
        padding: 20px 0 0 20px;
      }

      .item {
        display: none;
      }
    </style>
  </head>

  <body>
    <div class="tab">
      <div class="tab_list">
        <ul>
          <li class="current">商品介绍</li>
          <li>规格与包装</li>
          <li>售后保障</li>
          <li>商品评价(50000)</li>
          <li>手机社区</li>
        </ul>
      </div>
      <div class="tab_con">
        <div class="item" style="display: block;">商品介绍模块内容</div>
        <div class="item">规格与包装模块内容</div>
        <div class="item">售后保障模块内容</div>
        <div class="item">商品评价(50000)模块内容</div>
        <div class="item">手机社区模块内容</div>
      </div>
    </div>
    <script>
      var list = document.querySelector('.tab_list').querySelectorAll('li') //获得所有的标签栏模块
      var items = document.querySelector('.tab_con').querySelectorAll('.item')
      console.log(list)

      for (var i = 0; i < list.length; i++) {
        //为所有li 添加自定义属性:编号
        list[i].setAttribute('index', i)
        console.log(items[i].getAttribute('index'))
        //为所有标签页绑定点击事件
        list[i].onclick = function () {
          //排他思想。先干掉所有人,留下自己
          for (var j = 0; j < list.length; j++) {
            list[j].className = ''
          }
          this.className = 'current'

          var index = this.getAttribute('index')
          console.log(index)

          for (var j = 0; j < items.length; j++) {
            items[j].style.display = 'none  '
          }
          items[index].style.display = 'block'
        }
      }
    </script>
  </body>
</html>
# 3.3 自定义属性
目的:保存并使用数据
# 3.3.1 设置 H5 自定义属性 ---- data-开头的属性
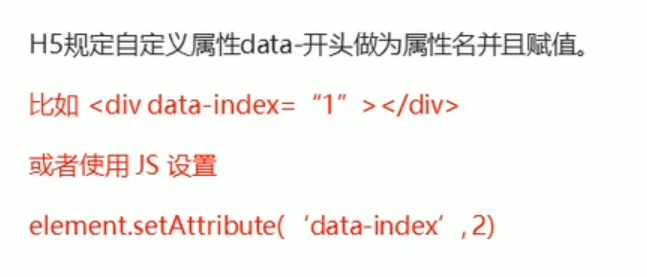
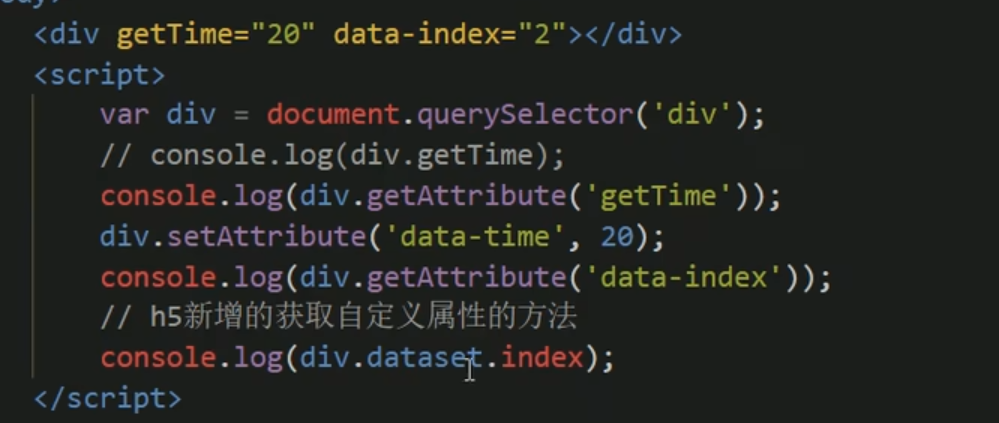
dataset:是一个集合,里面存放了所有的以 data 开头的自定义属性
如果自定义属性里面有多个’-‘连接的单词,我们获取的时候采取驼峰命名法

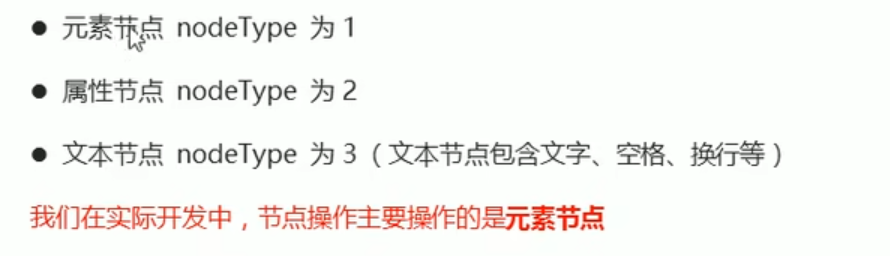
# 3.4 节点操作
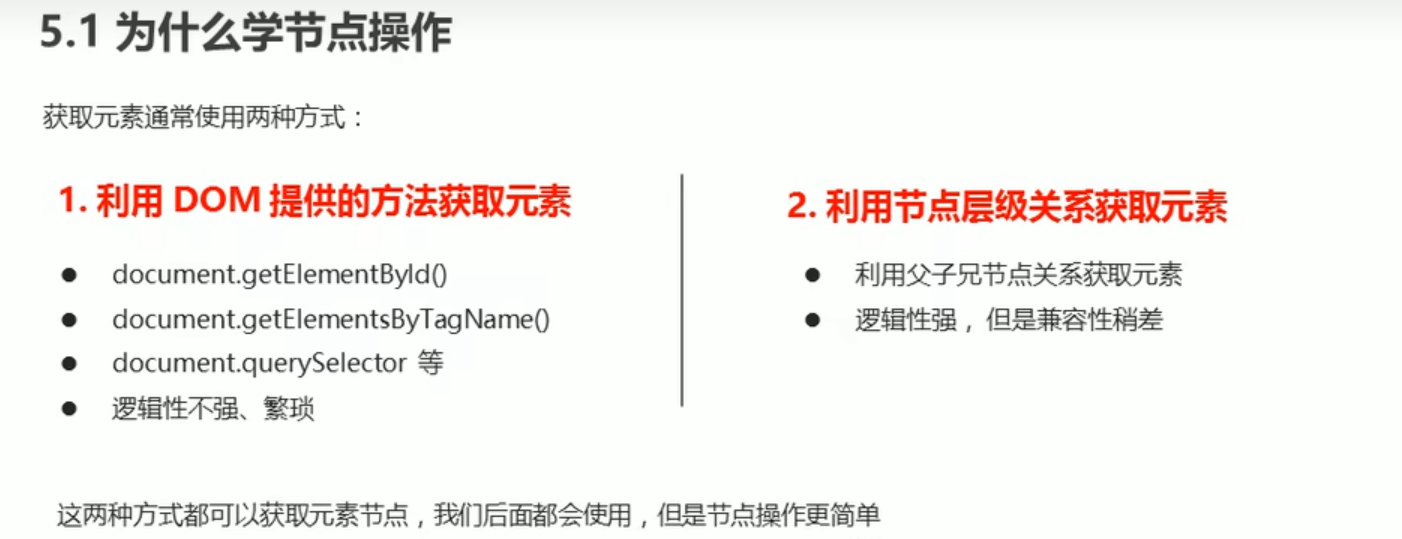
节点:标签,文本,属性
节点一般属性有:NodeType(节点类型),NodeName(节点名),NodeValue(节点值)
# 3.5 节点层级
----常见的是父子兄层级关系
# 3.5.1 父节点
Node.parentNode:获取当前节点的父节点,得到的是离元素最近的父节点。如果找不到,则返回为空
# 3.5.2 子节点
parentNode.childNodes:获取当前节点的所有的子节点,包含文本节点等等 (不推荐)
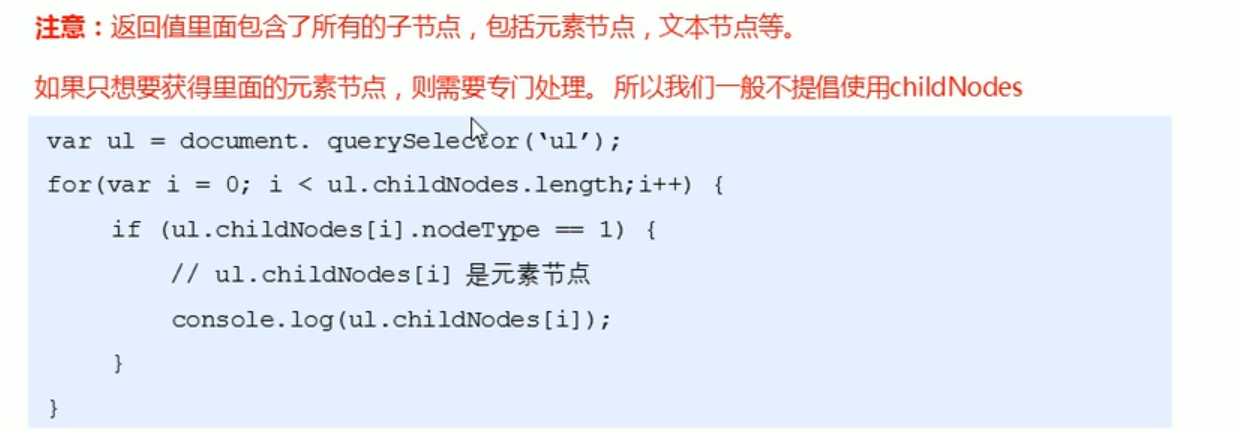
# 3.5.2 子节点(推荐)
parentNode.children:获取所有子元素节点,实际开发常用!!
# 3.5.3 第一个子节点和最后一个子节点
第一个子节点:parentNode.firstChild 第一个子节点,不管是文本节点还是元素节点
最后一个子节点:parentNode.lastChild 最后一个子节点,不管是文本节点还是元素节点
第一个子元素节点:parentNode.firstElementChild 第一个子元素节点
最后一个子元素节点:parentNode.lastElementChild 最后一个子元素节点
// 实际开发的写法,既没有兼容性问题,又能返回第一个子元素节点
第一个:parentNode.children[0]
最后一个:parentNode.children[parentNode.children-1]
# 下拉菜单案例
<!DOCTYPE html>
<html lang="en">
  <head>
    <meta charset="UTF-8" />
    <meta name="viewport" content="width=device-width, initial-scale=1.0" />
    <meta http-equiv="X-UA-Compatible" content="ie=edge" />
    <title>Document</title>
    <style>
      * {
        margin: 0;
        padding: 0;
      }

      li {
        list-style-type: none;
      }

      a {
        text-decoration: none;
        font-size: 14px;
      }

      .nav {
        margin: 100px;
      }

      .nav > li {
        position: relative;
        float: left;
        width: 80px;
        height: 41px;
        text-align: center;
      }

      .nav li a {
        display: block;
        width: 100%;
        height: 100%;
        line-height: 41px;
        color: #333;
      }

      .nav > li > a:hover {
        background-color: #eee;
      }

      .nav ul {
        display: none;
        position: absolute;
        top: 41px;
        left: 0;
        width: 100%;
        border-left: 1px solid #fecc5b;
        border-right: 1px solid #fecc5b;
      }

      .nav ul li {
        border-bottom: 1px solid #fecc5b;
      }

      .nav ul li a:hover {
        background-color: #fff5da;
      }
    </style>
  </head>

  <body>
    <ul class="nav">
      <li>
        <a href="#">微博</a>
        <ul>
          <li>
            <a href="">私信</a>
          </li>
          <li>
            <a href="">评论</a>
          </li>
          <li>
            <a href="">@我</a>
          </li>
        </ul>
      </li>
      <li>
        <a href="#">微博</a>
        <ul>
          <li>
            <a href="">私信</a>
          </li>
          <li>
            <a href="">评论</a>
          </li>
          <li>
            <a href="">@我</a>
          </li>
        </ul>
      </li>
      <li>
        <a href="#">微博</a>
        <ul>
          <li>
            <a href="">私信</a>
          </li>
          <li>
            <a href="">评论</a>
          </li>
          <li>
            <a href="">@我</a>
          </li>
        </ul>
      </li>
      <li>
        <a href="#">微博</a>
        <ul>
          <li>
            <a href="">私信</a>
          </li>
          <li>
            <a href="">评论</a>
          </li>
          <li>
            <a href="">@我</a>
          </li>
        </ul>
      </li>
    </ul>
    <script>
      var nav = document.querySelector('.nav')
      var list = nav.children //获得4个小li
      //为4个小li绑定鼠标经过和离开时间
      for (var i = 0; i < list.length; i++) {
        list[i].onmouseover = function () {
          this.children[1].style.display = 'block'
        }
        list[i].onmouseout = function () {
          this.children[1].style.display = 'none'
        }
      }
    </script>
  </body>
</html>
# 3.6 兄弟节点
node.nextSibing:返回下一个兄弟节点,包括元素节点,文本节点
node.previousSibing:返回上一个兄弟节点,包括元素节点,文本节点
node.nextElementSibing:返回下一个兄弟元素节点(有兼容性问题)
node.previousElementSibing:返回上一个兄弟元素节点
# 3.7 创建和添加节点
# 3.7.1 创建元素节点
document.createElement('li')
# 3.7.2 添加节点
node.appendChild(child) node:父节点 child:子节点---后面增加元素 类似于数组中的 push
node.insertBefore(child,指定元素)

# 案例:简单版发布留言案例
<!DOCTYPE html>
<html lang="en">
  <head>
    <meta charset="UTF-8" />
    <meta name="viewport" content="width=device-width, initial-scale=1.0" />
    <meta http-equiv="X-UA-Compatible" content="ie=edge" />
    <title>Document</title>
    <style>
      * {
        margin: 0;
        padding: 0;
      }

      body {
        padding: 100px;
      }

      textarea {
        width: 200px;
        height: 100px;
        border: 1px solid pink;
        outline: none;
        resize: none;
      }

      ul {
        margin-top: 50px;
      }

      li {
        width: 300px;
        padding: 5px;
        background-color: rgb(245, 209, 243);
        color: red;
        font-size: 14px;
        margin: 15px 0;
      }
    </style>
  </head>

  <body>
    <textarea name="" id=""></textarea>
    <button>发布</button>
    <ul></ul>
    <script>
      var textarea = document.querySelector('textarea')
      var btn = document.querySelector('button')
      var ul = document.querySelector('ul')
      btn.onclick = function () {
        //1. 创建元素
        var li = document.createElement('li')
        //2.添加元素
        if (textarea.value == '') {
          alert('您还没有输入评论信息')
          return false
        } else {
          li.innerHTML = textarea.value
          // ul.appendChild(li)
          ul.insertBefore(li, ul.children[0])
        }
      }
    </script>
  </body>
</html>
# 3.8 删除节点
node.removeChild(child) //删除父节点里的某一个子节点
<!DOCTYPE html>
<html lang="en">
  <head>
    <meta charset="UTF-8" />
    <title>Title</title>
  </head>
  <body>
    <button>删除</button>
    <ul>
      <li>熊大</li>
      <li>熊二</li>
      <li>光头强</li>
    </ul>
    <script>
      var button = document.querySelector('button')
      var ul = document.querySelector('ul')
      button.onclick = function () {
        if (ul.children.length == 0) {
          this.disabled = true
        } else {
          ul.removeChild(ul.children[0])
        }
      }
    </script>
  </body>
</html>
# 案例: 删除留言

<!DOCTYPE html>
<html lang="en">
  <head>
    <meta charset="UTF-8" />
    <meta name="viewport" content="width=device-width, initial-scale=1.0" />
    <meta http-equiv="X-UA-Compatible" content="ie=edge" />
    <title>Document</title>
    <style>
      * {
        margin: 0;
        padding: 0;
      }

      body {
        padding: 100px;
      }

      textarea {
        width: 200px;
        height: 100px;
        border: 1px solid pink;
        outline: none;
        resize: none;
      }

      ul {
        margin-top: 50px;
      }

      li {
        width: 300px;
        padding: 5px;
        background-color: rgb(209, 245, 217);
        color: red;
        font-size: 14px;
        margin: 15px 0;
      }
      li a {
        float: right;
        text-decoration: none;
      }
      li a:hover {
        cursor: pointer;
        color: #ffffff;
      }
    </style>
  </head>

  <body>
    <textarea name="" id=""></textarea>
    <button>发布</button>
    <ul></ul>
    <script>
      var textarea = document.querySelector('textarea')
      var btn = document.querySelector('button')
      var ul = document.querySelector('ul')
      btn.onclick = function () {
        //1. 创建元素
        var li = document.createElement('li')
        //2.添加元素
        if (textarea.value == '') {
          alert('您还没有输入评论信息')
          return false
        } else {
          li.innerHTML = textarea.value + "<a href='javascript:;'>删除</a>"
          textarea.value = '' //清空文本域的内容
          // ul.appendChild(li)
          ul.insertBefore(li, ul.children[0])
        }
        //3.删除元素 删除的是当前连接的li,即a的父亲
        var as = document.querySelectorAll('a')
        for (var i = 0; i < as.length; i++) {
          as[i].onclick = function () {
            if (as.length != 0) {
              //删除的是li,a的父亲
              ul.removeChild(this.parentNode)
              alert('评论删除成功')
            } else {
              alert('留言板已被删除完')
            }
          }
        }
      }
    </script>
  </body>
</html>
# 3.9 复制节点(克隆节点)
node.cloneNode(),返回该方法调用节点的副本 括号为空或里面是 false 浅拷贝,只复制标签,不复制里面的内容
node.cloneNode(),返回该方法调用节点的副本 如果括号为 true 深拷贝,复制标签和里面的内容
# 案例:动态生成表格
<!DOCTYPE html>
<html lang="en">
  <head>
    <meta charset="UTF-8" />
    <meta name="viewport" content="width=device-width, initial-scale=1.0" />
    <meta http-equiv="X-UA-Compatible" content="ie=edge" />
    <title>Document</title>
    <style>
      table {
        width: 500px;
        margin: 100px auto;
        border-collapse: collapse;
        text-align: center;
      }

      td,
      th {
        border: 1px solid #333;
      }

      thead tr {
        height: 40px;
        background-color: #ccc;
      }
      a {
        text-decoration: none;
        color: #333333;
      }
      a:hover {
        color: skyblue;
      }
    </style>
  </head>

  <body>
    <table cellspacing="0">
      <thead>
        <tr>
          <th>姓名</th>
          <th>科目</th>
          <th>成绩</th>
          <th>操作</th>
        </tr>
      </thead>
      <tbody></tbody>
    </table>
    <script>
      //定义表格数据
      var datas = [
        {
          name: '张三',
          subject: 'JavaScript',
          score: 99
        },
        {
          name: '李四',
          subject: 'JavaScript',
          score: 90
        },
        {
          name: '王五',
          subject: 'JavaScript',
          score: 88
        },
        {
          name: '老六',
          subject: 'JavaScript',
          score: 98
        }
      ]
      //获得tbody元素节点
      var tbody = document.querySelector('tbody')
      //生成行
      for (var i = 0; i < datas.length; i++) {
        var tr = document.createElement('tr')
        tbody.appendChild(tr)

        //    重点: for (var k in obj){
        // k:对象名
        //obj[k]:对象值
        //  }
        //生成列
        for (var k in datas[i]) {
          var td = document.createElement('td')
          //填充单元格数据
          // console.log(datas[i][k])
          td.innerHTML = datas[i][k]
          tr.appendChild(td)
        }
        //生成最后有删除二字的最后一列
        var lastTd = document.createElement('td')
        lastTd.innerHTML = "<a href='javascript:;'>删除</a>"
        tr.appendChild(lastTd)
      }
      var as = document.querySelectorAll('a')
      //添加删除事件
      for (var i = 0; i < as.length; i++) {
        as[i].onclick = function () {
          //a 的父节点是td,td的父节点是tr,要删除的是tr 即  this.parentNode.parentNode    tr的父节点是tbody
          tbody.removeChild(this.parentNode.parentNode)
          alert('删除成功')
        }
      }
    </script>
  </body>
</html>
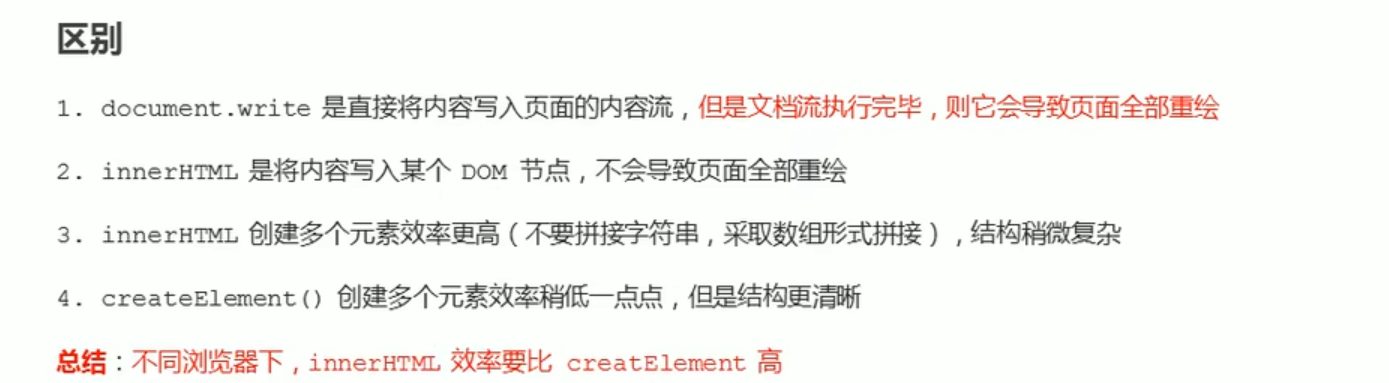
# 4.0 三种动态创建元素区别
# 4.1 事件高级
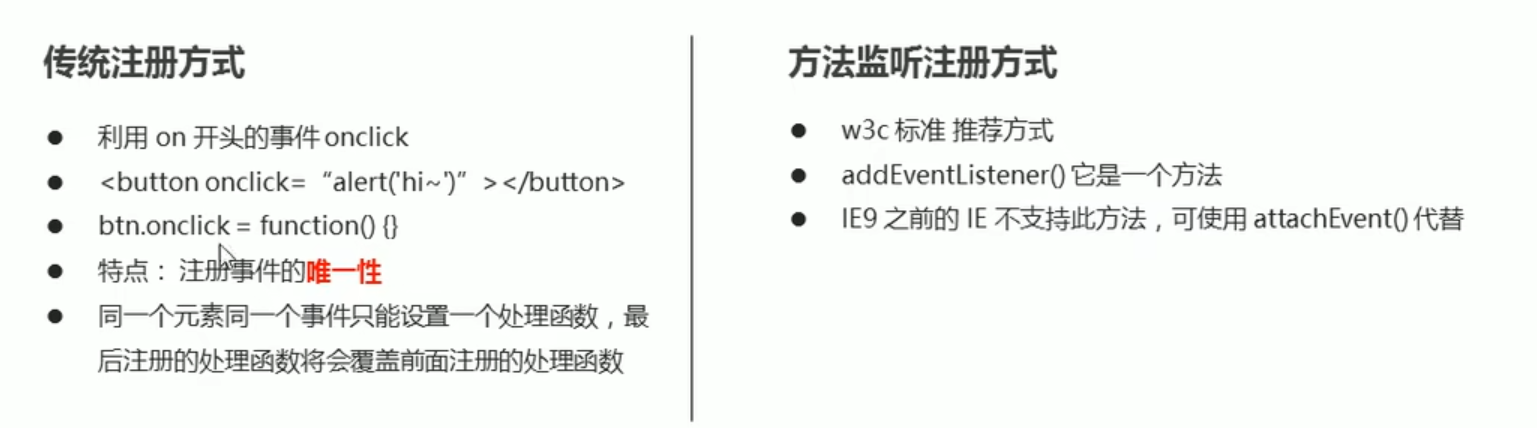
# 4.1.1 注册事件(绑定事件)
传统方式和方法监听注册方式
# 4.1.2 addEventListener 事件监听方式

<!DOCTYPE html>
<html lang="en">
  <head>
    <meta charset="UTF-8" />
    <title>Title</title>
  </head>
  <body>
    <button>传统注册事件</button>
    <button>方法监听注册事件</button>
    <script>
      var btns = document.querySelectorAll('button')
      //  传统注册事件  存在唯一性,后面的处理函数的处理结果会覆盖前面处理函数的处理结果
      btns[0].onclick = function () {
        alert(11)
      }
      btns[0].onclick = function () {
        alert(22)
      }
      //方法监听注册事件   addEventListener
      //(1) 里面的事件类型是字符串,必须带引号,而且不带on
      //(2)同一元素,同一类型的事件可以添加多个 监听器(事件处理程序)
      btns[1].addEventListener('click', function () {
        alert(33)
      })
      btns[1].addEventListener('click', function () {
        alert(44)
      })
    </script>
  </body>
</html>
# 4.1.3 删除事件(解绑事件)
- 传统方式: element.onclick=null
- 方法监听方式:element.removeEventListener

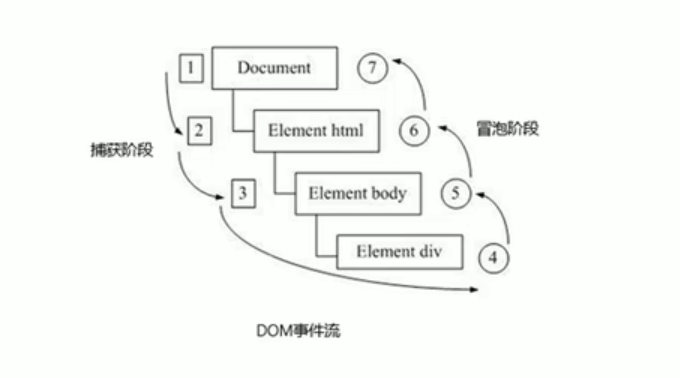
# 4.1.4 DOM 事件流---事件传播的过程
三个阶段:捕获阶段、当前目标阶段、冒泡阶段。
注意:
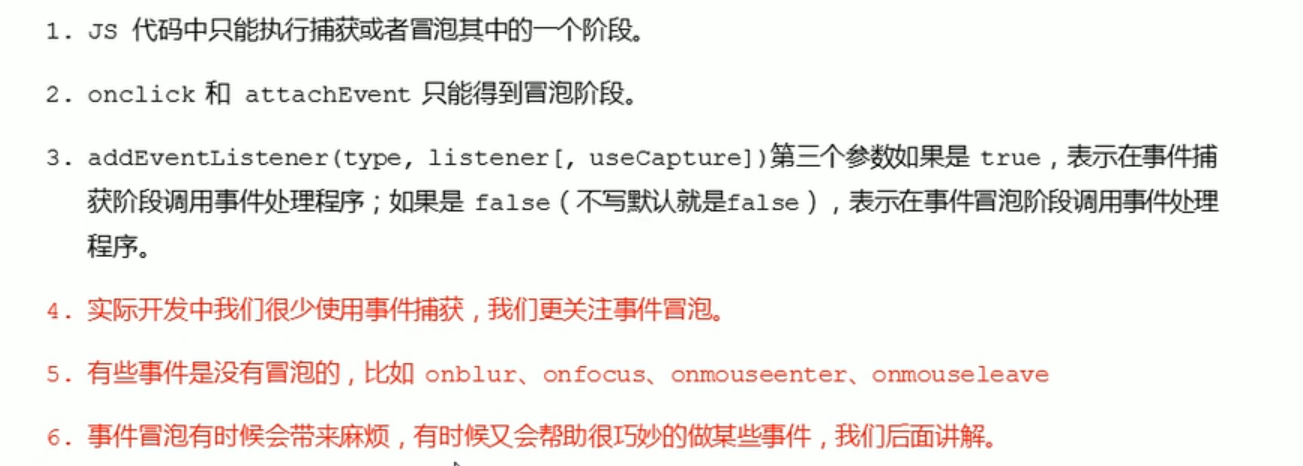
# 4.1.5 事件对象
<!DOCTYPE html>
<html lang="en">
  <head>
    <meta charset="UTF-8" />
    <meta name="viewport" content="width=device-width, initial-scale=1.0" />
    <meta http-equiv="X-UA-Compatible" content="ie=edge" />
    <title>Document</title>
    <style>
      div {
        width: 100px;
        height: 100px;
        background-color: pink;
      }
    </style>
  </head>

  <body>
    <div>123</div>
    <script>
      // 事件对象
      var div = document.querySelector('div')
      div.onclick = function (e) {
        // console.log(e);
        // console.log(window.event);
        // e = e || window.event;
        console.log(e)
      }
      // div.addEventListener('click', function(e) {
      //         console.log(e);

      //     })
      // 1. event 就是一个事件对象 写到我们侦听函数的 小括号里面 当形参来看
      // 2. 事件对象只有有了事件才会存在,它是系统给我们自动创建的,不需要我们传递参数
      // 3. 事件对象 是 我们事件的一系列相关数据的集合 跟事件相关的 比如鼠标点击里面就包含了鼠标的相关信息,鼠标坐标啊,如果是键盘事件里面就包含的键盘事件的信息 比如 判断用户按下了那个键
      // 4. 这个事件对象我们可以自己命名 比如 event 、 evt、 e
      // 5. 事件对象也有兼容性问题 ie678 通过 window.event 兼容性的写法  e = e || window.event;
    </script>
  </body>
</html>
# 4.1.6 e.target 和 this 区别
<!DOCTYPE html>
<html lang="en">
  <head>
    <meta charset="UTF-8" />
    <meta name="viewport" content="width=device-width, initial-scale=1.0" />
    <meta http-equiv="X-UA-Compatible" content="ie=edge" />
    <title>Document</title>
    <style>
      div {
        width: 100px;
        height: 100px;
        background-color: pink;
      }
    </style>
  </head>

  <body>
    <div>123</div>
    <ul>
      <li>abc</li>
      <li>abc</li>
      <li>abc</li>
    </ul>
    <script>
      // 常见事件对象的属性和方法
      // 1. e.target 返回的是触发事件的对象(元素)  this 返回的是绑定事件的对象(元素)
      // 区别 : e.target 点击了那个元素,就返回那个元素     this 那个元素绑定了这个点击事件,那么就返回谁
      var div = document.querySelector('div')
      div.addEventListener('click', function (e) {
        console.log(e.target)
        console.log(this)
      })
      var ul = document.querySelector('ul')
      ul.addEventListener('click', function (e) {
        // 我们给ul 绑定了事件  那么this 就指向ul
        console.log(this)
        console.log(e.currentTarget)

        // e.target 指向我们点击的那个对象 谁触发了这个事件 我们点击的是li e.target 指向的就是li
        console.log(e.target)
      })
      // 了解兼容性
      // div.onclick = function(e) {
      //     e = e || window.event;
      //     var target = e.target || e.srcElement;
      //     console.log(target);

      // }
      // 2. 了解 跟 this 有个非常相似的属性 currentTarget  ie678不认识
    </script>
  </body>
</html>
# 4.1.7 事件对象常见的属性和方法
<!DOCTYPE html>
<html lang="en">
  <head>
    <meta charset="UTF-8" />
    <meta name="viewport" content="width=device-width, initial-scale=1.0" />
    <meta http-equiv="X-UA-Compatible" content="ie=edge" />
    <title>Document</title>
    <style></style>
  </head>

  <body>
    <div>123</div>
    <a href="http://www.baidu.com">百度</a>
    <form action="http://www.baidu.com">
      <input type="submit" value="提交" name="sub" />
    </form>
    <script>
      // 常见事件对象的属性和方法
      // 1. 返回事件类型
      var div = document.querySelector('div')
      div.addEventListener('click', fn)
      div.addEventListener('mouseover', fn)
      div.addEventListener('mouseout', fn)

      function fn(e) {
        console.log(e.type)
      }
      // 2. 阻止默认行为(事件) 让链接不跳转 或者让提交按钮不提交
      var a = document.querySelector('a')
      a.addEventListener('click', function (e) {
        e.preventDefault() //  dom 标准写法
      })
      // 3. 传统的注册方式
      a.onclick = function (e) {
        // 普通浏览器 e.preventDefault();  方法
        // e.preventDefault();
        // 低版本浏览器 ie678  returnValue  属性
        // e.returnValue;
        // 我们可以利用return false 也能阻止默认行为 没有兼容性问题 特点: return 后面的代码不执行了, 而且只限于传统的注册方式
        return false
        alert(11)
      }
    </script>
  </body>
</html>
# 4.1.8 阻止事件冒泡(重点)
<!DOCTYPE html>
<html lang="en">
  <head>
    <meta charset="UTF-8" />
    <meta name="viewport" content="width=device-width, initial-scale=1.0" />
    <meta http-equiv="X-UA-Compatible" content="ie=edge" />
    <title>Document</title>
    <style>
      .father {
        overflow: hidden;
        width: 300px;
        height: 300px;
        margin: 100px auto;
        background-color: pink;
        text-align: center;
      }

      .son {
        width: 200px;
        height: 200px;
        margin: 50px;
        background-color: purple;
        line-height: 200px;
        color: #fff;
      }
    </style>
  </head>

  <body>
    <div class="father">
      <div class="son">son儿子</div>
    </div>
    <script>
      // 常见事件对象的属性和方法
      // 阻止冒泡  dom 推荐的标准 stopPropagation()
      var son = document.querySelector('.son')
      son.addEventListener(
        'click',
        function (e) {
          alert('son')
          e.stopPropagation() // stop 停止  Propagation 传播
          e.cancelBubble = true // 非标准 cancel 取消 bubble 泡泡
        },
        false
      )

      var father = document.querySelector('.father')
      father.addEventListener(
        'click',
        function () {
          alert('father')
        },
        false
      )
      document.addEventListener('click', function () {
        alert('document')
      })
    </script>
  </body>
</html>
# 4.1.9 事件委托(代理,委派)
# 原理:
不是每个子节点单独设置事件监听器,而是事件监听器设置在其父节点上,然后利用冒泡原理影响设置每个子节点
<!DOCTYPE html>
<html lang="en" xmlns="http://www.w3.org/1999/html">
  <head>
    <meta charset="UTF-8" />
    <title>Title</title>
  </head>
  <body>
    <ul>
      <li>知否知否,应是绿肥红瘦</li>
      <li>知否知否,应是绿肥红瘦</li>
      <li>知否知否,应是绿肥红瘦</li>
      <li>知否知否,应是绿肥红瘦</li>
      <li>知否知否,应是绿肥红瘦</li>
    </ul>
    <script>
      var ul = document.querySelector('ul')
      var lis = document.querySelectorAll('li')
      //事件监听器设置在其父节点上,然后利用冒泡原理影响设置每个子节点
      ul.addEventListener('click', function (e) {
        // alert("知否知否,应是绿肥红瘦")
        //利用e.target可以获取到当前被点击的对象
        for (var i = 0; i < lis.length; i++) {
          lis[i].style.backgroundColor = ''
        }
        e.target.style.backgroundColor = 'pink'
      })
    </script>
  </body>
</html>
# 4.1.10 常见的鼠标事件
<!DOCTYPE html>
<html lang="en">
  <head>
    <meta charset="UTF-8" />
    <title>Title</title>
  </head>
  <body>
    <div>这是一段不愿意分享的文字</div>
    <script>
      //1. contextmenu 我们可以禁用右键菜单
      document.addEventListener('contextmenu', function (e) {
        e.preventDefault()
      })
      //2. selectstart 我们可以禁止选中文字
      document.addEventListener('selectstart', function (e) {
        e.preventDefault()
      })
    </script>
  </body>
</html>
# 4.1.11 鼠标事件对象 MouseEvent
<!DOCTYPE html>
<html lang="en">
  <head>
    <meta charset="UTF-8" />
    <meta name="viewport" content="width=device-width, initial-scale=1.0" />
    <meta http-equiv="X-UA-Compatible" content="ie=edge" />
    <title>Document</title>
    <style>
      body {
        height: 3000px;
      }
    </style>
  </head>

  <body>
    <script>
      // 鼠标事件对象 MouseEvent
      document.addEventListener('click', function (e) {
        // 1. client 鼠标在可视区的x和y坐标
        console.log(e.clientX)
        console.log(e.clientY)
        console.log('---------------------')

        // 2. page 鼠标在页面文档的x和y坐标
        console.log(e.pageX)
        console.log(e.pageY)
        console.log('---------------------')

        // 3. screen 鼠标在电脑屏幕的x和y坐标
        console.log(e.screenX)
        console.log(e.screenY)
      })
    </script>
  </body>
</html>
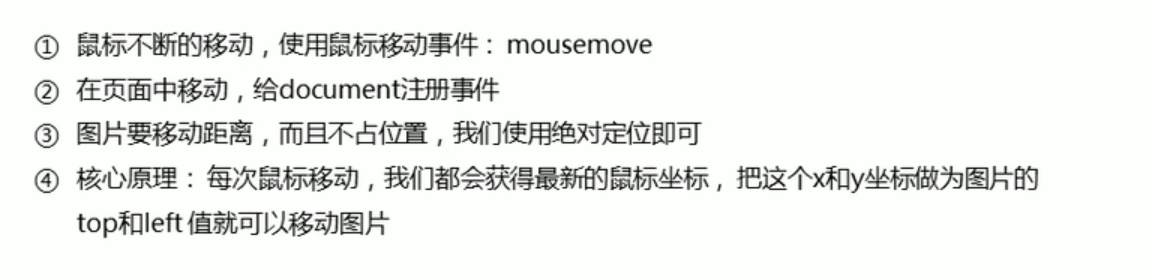
# 案例:跟随鼠标的天使
<!DOCTYPE html>
<html lang="en">
  <head>
    <meta charset="UTF-8" />
    <title>Title</title>
  </head>
  <style>
    img {
      position: absolute;
    }
  </style>
  <body>
    <img src="./img/angel.gif" alt="" />
    <script>
      var img = document.querySelector('img')
      //mousemove 鼠标移动事件,鼠标每移动1px,都会发生变化
      document.addEventListener('mousemove', function (e) {
        // 通过不断获取鼠标当前位置的x,y坐标作为图片的left 和 top的值来实现效果
        // 因为图片要移动且不占位置,所以应为绝对定位
        var x = e.pageX
        var y = e.pageY
        //top left 必须跟单位px
        img.style.top = y - 35 + 'px'
        img.style.left = x - 40 + 'px'
      })
    </script>
  </body>
</html>
# 4.1.12 常用的键盘事件
<!DOCTYPE html>
<html lang="en">
  <head>
    <meta charset="UTF-8" />
    <title>Title</title>
  </head>
  <body>
    <script>
      document.addEventListener('keyup', function () {
        console.log('键盘弹起')
      })
      document.addEventListener('keydown', function () {
        console.log('键盘按下')
      })
      //keypress:键盘按下时出发,与keydown区别:keypress不识别功能键,例如 ctrl,shift,左右箭头
      document.addEventListener('keypress', function () {
        console.log('键盘按下')
      })
      //三个事件的执行顺序:keydown---keypress----keyup
    </script>
  </body>
</html>
# 4.1.13 键盘事件对象
<!DOCTYPE html>
<html lang="en">
  <head>
    <meta charset="UTF-8" />
    <meta name="viewport" content="width=device-width, initial-scale=1.0" />
    <meta http-equiv="X-UA-Compatible" content="ie=edge" />
    <title>Document</title>
  </head>

  <body>
    <script>
      // 键盘事件对象中的keyCode属性可以得到相应键的ASCII码值
      // 1. 我们的keyup 和keydown事件不区分字母大小写  a 和 A 得到的都是65
      // 2. 我们的keypress 事件 区分字母大小写  a  97 和 A 得到的是65
      document.addEventListener('keyup', function (e) {
        // console.log(e);
        console.log('up:' + e.keyCode)
        // 我们可以利用keycode返回的ASCII码值来判断用户按下了那个键
        if (e.keyCode === 65) {
          alert('您按下的a键')
        } else {
          alert('您没有按下a键')
        }
      })
      document.addEventListener('keypress', function (e) {
        // console.log(e);
        console.log('press:' + e.keyCode)
      })
    </script>
  </body>
</html>
案例:键盘按 enter 键让当前的文本框获得焦点
<!DOCTYPE html>
<html lang="en">
  <head>
    <meta charset="UTF-8" />
    <title>Title</title>
  </head>
  <style>
    .box {
      width: 300px;
      margin: 100px auto;
      border: 1px solid #999999;
    }
    .box input {
      width: 200px;
      height: 30px;
      border: 0;
      outline: none;
    }
  </style>
  <body>
    <div class="box">
      <input type="text" name="" id="" />
    </div>
    <script>
      var input = document.querySelector('input')
      document.addEventListener('keyup', function (e) {
        if (e.keyCode == '13') {
          input.focus() //获得焦点 调用js内置的focus函数
        }
      })
    </script>
  </body>
</html>
# 案例:京东快递单号填写
<!DOCTYPE html>
<html lang="en">
  <head>
    <meta charset="UTF-8" />
    <meta name="viewport" content="width=device-width, initial-scale=1.0" />
    <meta http-equiv="X-UA-Compatible" content="ie=edge" />
    <title>Document</title>
    <style>
      * {
        margin: 0;
        padding: 0;
      }

      .search {
        position: relative;
        width: 178px;
        margin: 100px;
      }

      .con {
        display: none;
        position: absolute;
        top: -40px;
        width: 171px;
        border: 1px solid rgba(0, 0, 0, 0.2);
        box-shadow: 0 2px 4px rgba(0, 0, 0, 0.2);
        padding: 5px 0;
        font-size: 18px;
        line-height: 20px;
        color: #333;
      }

      .con::before {
        content: '';
        width: 0;
        height: 0;
        position: absolute;
        top: 28px;
        left: 18px;
        border: 8px solid #000;
        border-style: solid dashed dashed;
        border-color: #fff transparent transparent;
      }
    </style>
  </head>

  <body>
    <div class="search">
      <div class="con">123</div>
      <input type="text" placeholder="请输入您的快递单号" class="jd" />
    </div>
    <script>
      // 快递单号输入内容时, 上面的大号字体盒子(con)显示(这里面的字号更大)
      // 表单检测用户输入: 给表单添加键盘事件
      // 同时把快递单号里面的值(value)获取过来赋值给 con盒子(innerText)做为内容
      // 如果快递单号里面内容为空,则隐藏大号字体盒子(con)盒子
      var con = document.querySelector('.con')
      var inp = document.querySelector('input')
      inp.addEventListener('keyup', function (e) {
        if (this.value === '') {
          con.style.display = 'none'
        } else {
          con.style.display = 'block'
          con.innerHTML = this.value
        }
      })
      inp.addEventListener('blur', function (e) {
        con.style.display = 'none'
      })
      inp.addEventListener('focus', function (e) {
        if (this.value != '') con.style.display = 'block'
      })
    </script>
  </body>
</html>
